Overview
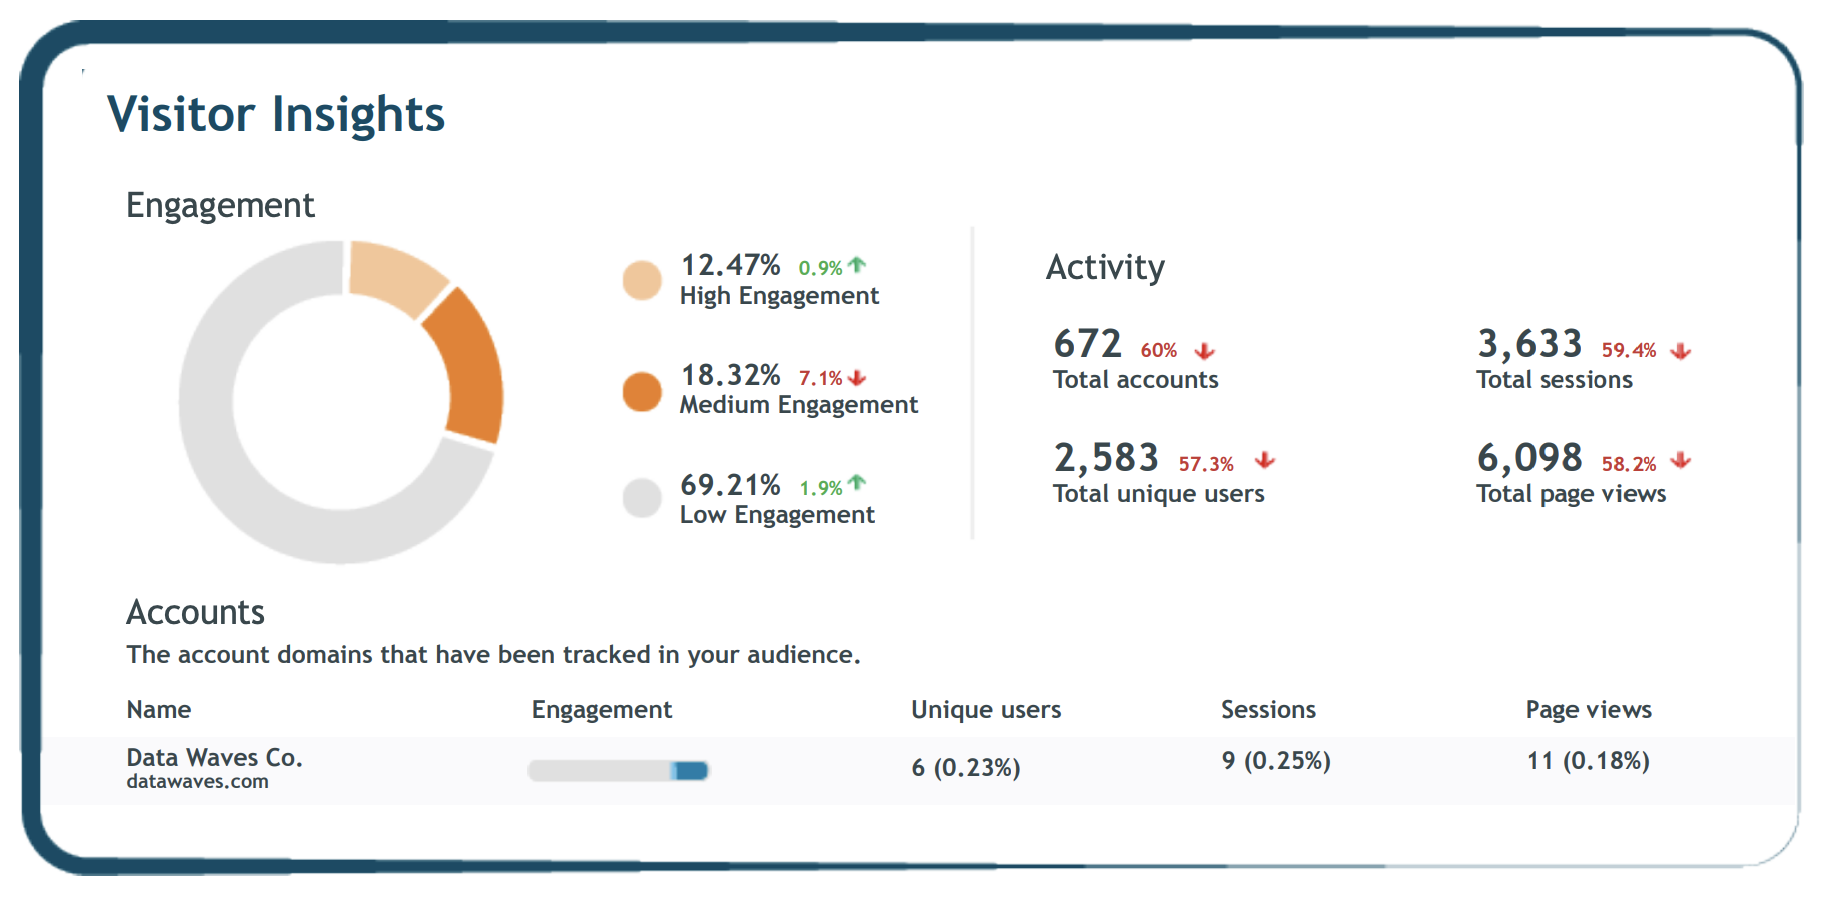
Visitor Insights transforms your anonymous website visitor data into insights that drive your marketing strategies and enable your sales team to win more business.
- Identify the businesses engaging with your website to learn who you’re reaching and who you’re not with your marketing and content programs.
- Capture warm leads for sales by knowing which businesses are visiting your website even if they don’t fill out a contact form.
- Focus marketing and sales on the same objective and measure impact with an account-based view.
How It works
Bombora’s Visitor Insights collects data through tags implemented on brand websites or digital ads.
When utilized, the tags provide insight into your anonymous website visitors and the businesses reached through digital ad campaigns.

Set up Visitor Insights
Identify the accounts visiting your website, even if they leave without initiating contact.
- Log into the Bombora Interface, navigate to ‘Measurement’ and select ‘Visitor Insights’
- Select the ‘Tag settings’ button
- On the right-hand side of the page, you will find the Bombora JavaScript tag.
See the full User Guide with detailed instructions to set up the Tag.
The Bombora JavaScript tag should be deployed across all pages. The Bombora tag can be placed in either the header or the body of the page(s).
Data Collected by the tag:
- Unique cookie IDs
- IP address and information derived such as geography
- Page URL and referrer URL*
- User agent: browser type and operating system (OS)
- User’s browser language*
- Engagement level data including dwell time, scroll depth, scroll velocity, and time between scrolls*
*Indicates data collected through the Visitor Insights tag only
Users can utilize Section Management within Visitor Insights in the Bombora User Interface.
Section management in the tag settings tab allows you to create additional Visitor Insights reports for specific pages on your website, for example, product pages, landing pages, etc. By default, you can create up to 5 sections. If you require more than 5 sections, please reach out to your Bombora account contact.
The default report for Visitor Insights is called ‘All traffic’. This report contains information about all the traffic that visited all the webpage(s) that you placed the Bombora tracking tag on.
When you enter the Visitor Insights module, you will see your ‘All traffic’ report as the default report.
You can navigate to additional reports created in ‘Section management’ by hovering over the ‘Sections’ dropdown on the top left-hand side and choosing the report you are interested in viewing.
You can view different date ranges of activity in the top right corner of the page. The date ranges that are available are: Yesterday, This Week, Last Week, This Month, Last Month, This Quarter, This Year.
Bombora offers a comprehensive daily or weekly feed that provides the companies, interactions, and intent of the visitors on your website.
Files can be used for data science research or advanced analysis of your website audience.
Get real-time insights into the demographic, firmographic, and Intent data attributes of your visitors directly in your Google Analytics. Align website performance goals against Bombora’s visitor data to get greater visibility into what programs are working and what’s not.


